Mighty hunt — forcing out the hidden Mighty (defender's view)

'Me' at the bottom is the viewpoint player; P2–P5 are the other four seats.
Setup
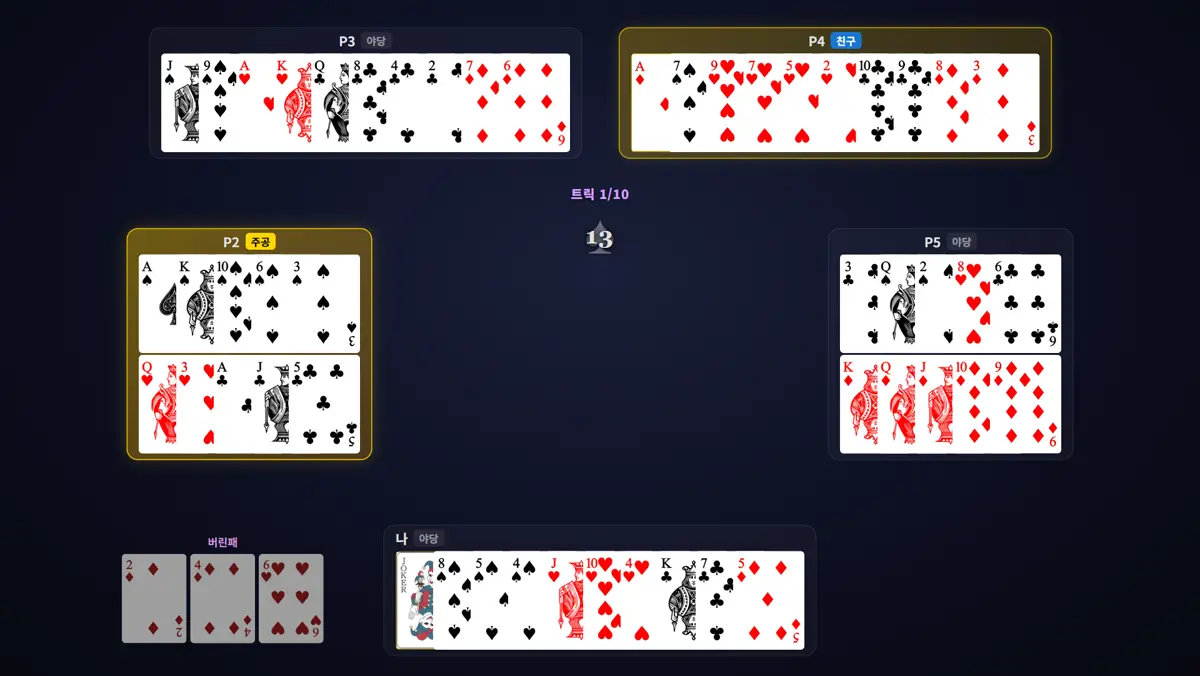
Mighty Basics Replay. This game is from the defenders' side: a Mighty hunt to draw out the hidden Mighty. I'm a defender. Trump (giruda) is spades, contract 13, and P2 is the declarer. Spades are trump, so ♦A is the Mighty, and also the Friend card. P4 holds it, so P4 is the Friend. The theme of this game is the Mighty hunt. It's the defenders' classic attack: lead the Mighty's suit, diamonds, low to force the Mighty out. My only diamond is ♦5, and my partner P5 actually held five diamonds. As we take turns leading diamonds, watch when the Mighty comes out, and why not to load honors in Mighty time. The whole game comes down to the last trick.
Trick 1
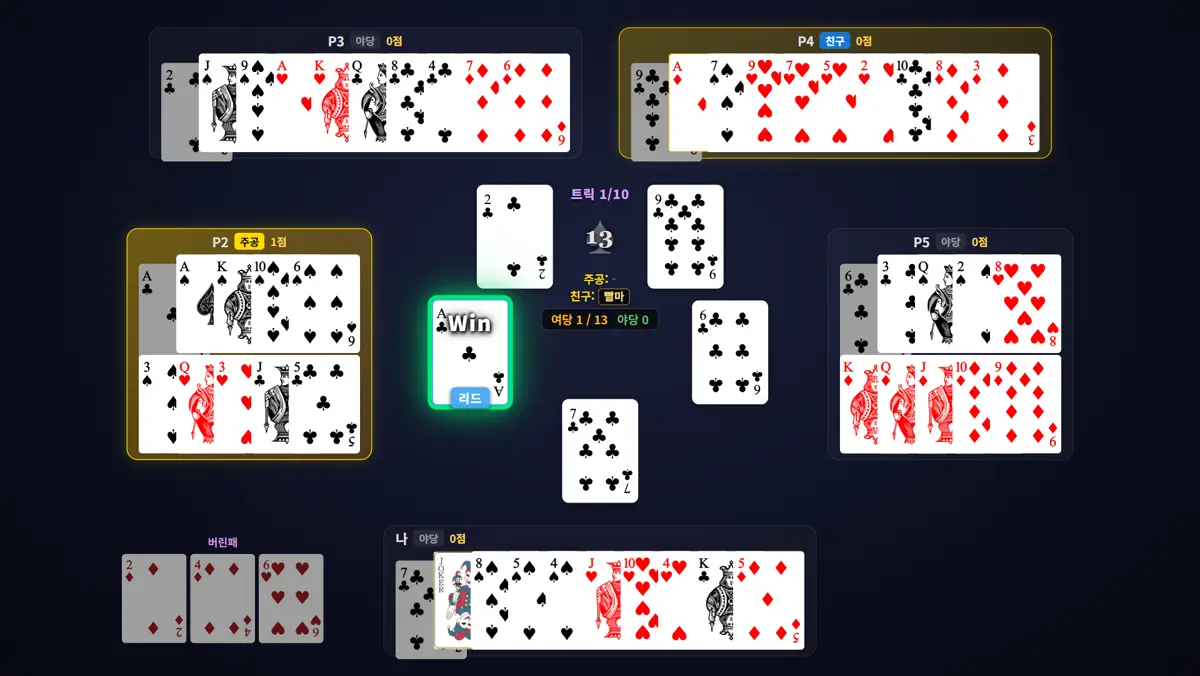
Declarer P2 opened with the boss card ♣A. Opening lead with a boss card. I couldn't win, so I dumped ♣7. In fact, the declarer discarded ♦2 and ♦4 in the exchange, so they had no diamonds from the start. Nobody knows this yet, but it will matter during the Mighty hunt.
Trick 2
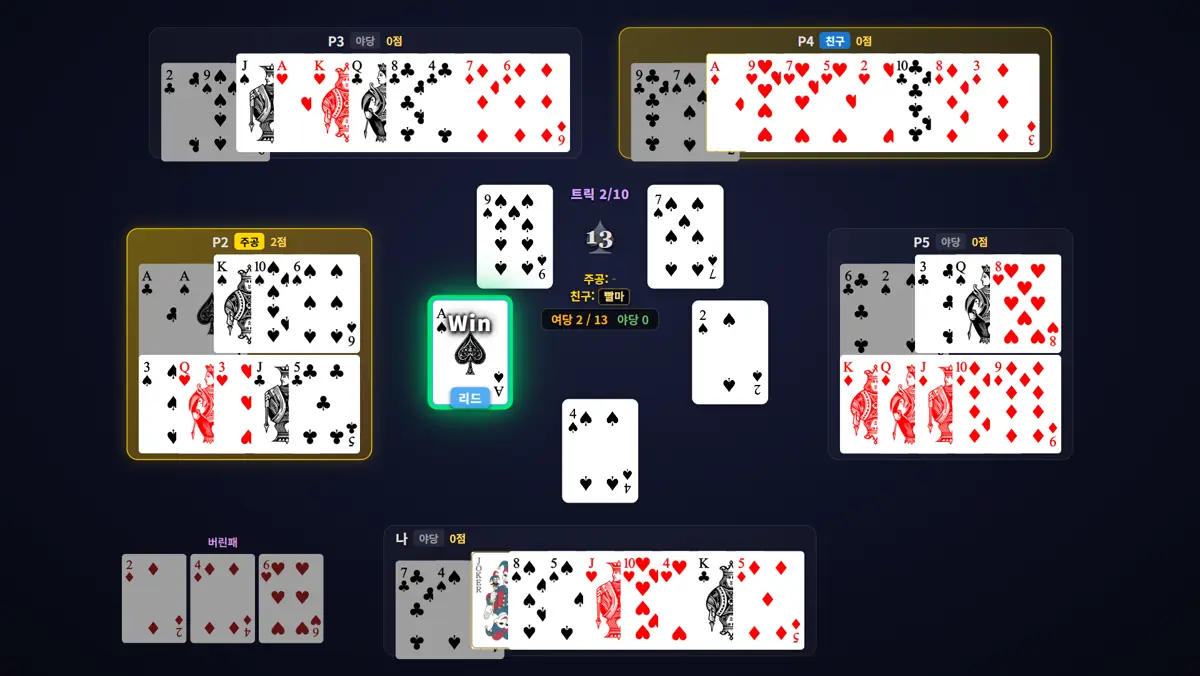
The declarer started the trump drain with ♠A. Everyone followed with trump, and I played my lowest, ♠4. Pulling the defenders' trumps keeps later boss cards from being ruffed. A textbook move. In fact, ♠7 was Friend P4's only trump, so P4 is already out of trumps.
Trick 3
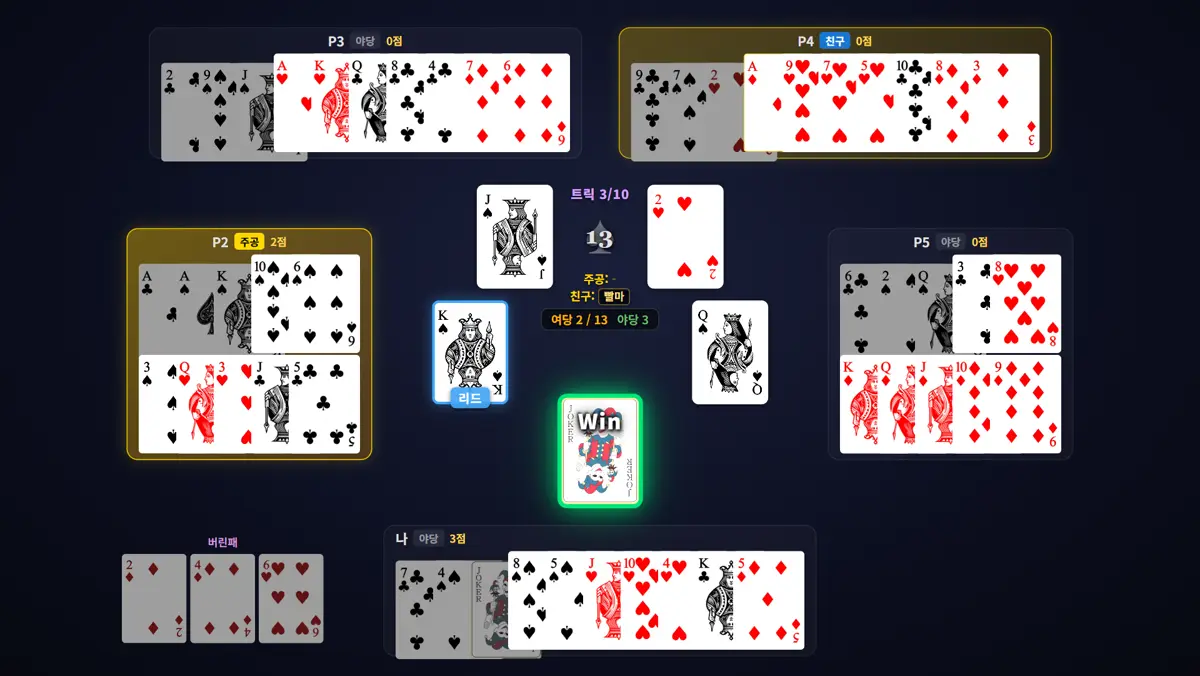
The declarer continued the trump drain with ♠K. P3 and P5 had only ♠J and ♠Q left as trump, so they had to follow; P4's ♥2 revealed a spade void. Last to play, I regained the lead with the Joker and took 3 points: ♠K, ♠J and ♠Q. No one played after me, so there was no risk of the Mighty covering it. 2:3, a turnaround. In fact, the trumps left are my ♠8, ♠5 and the declarer's ♠10, ♠6, ♠3.
Trick 4
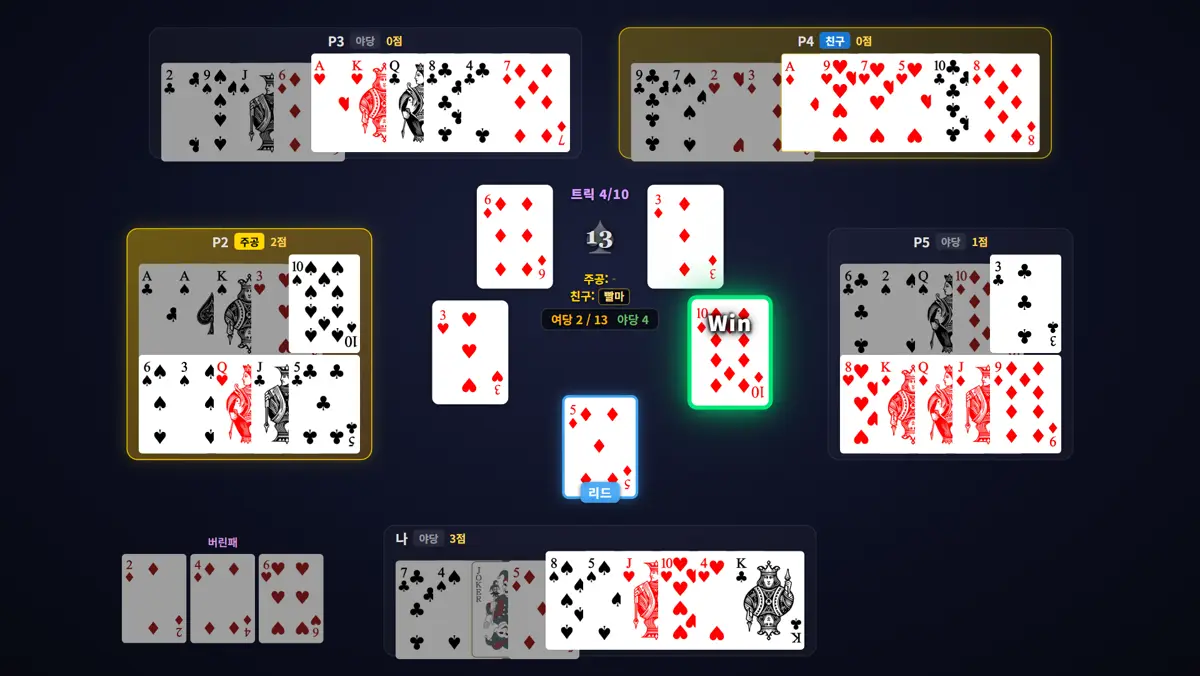
Holding the lead, I launched the Mighty hunt. I led the Mighty's suit, diamonds, low with ♦5, my only diamond. The declarer showed a diamond void with ♥3 but didn't ruff, and P4 saved the Mighty with ♦3. There's no reason to spend the Mighty on a trick with no points. Last to play, P5 won with ♦10: 1 point. That emptied my diamonds.
Trick 5
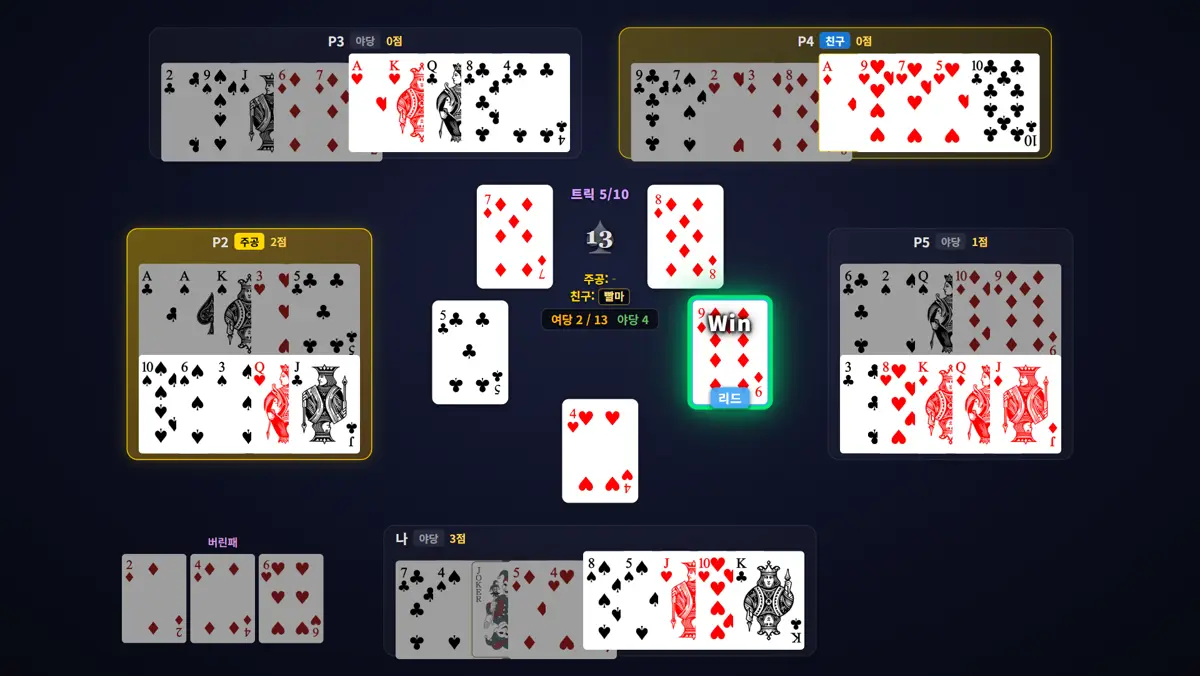
My partner P5 continued the Mighty hunt with ♦9. Out of diamonds, I had no reason to trump a 0-point trick, so I dumped ♥4. My diamond void is revealed. The declarer and the Mighty were still behind me, so a ruff couldn't have held anyway. Again the declarer didn't ruff and discarded ♣5, and P4 held on with ♦8. With no points in the trick, the declarer's team saved the Mighty. P5 won the 0-point trick and took back the lead.
Trick 6
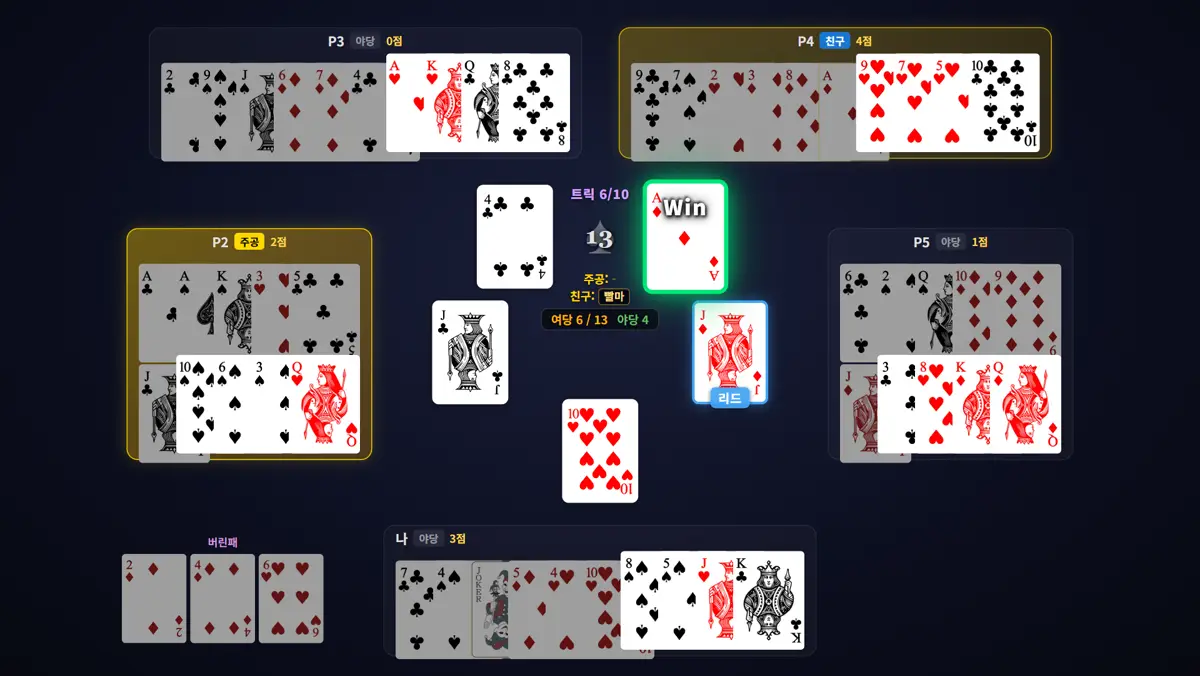
P5 led diamonds again; only point cards ♦K, ♦Q, ♦J were left, so P5 played ♦J. The Mighty hasn't appeared yet, so this is Mighty time. Ruffing with ♠5 would still lose to the Mighty, but it would give away no points. I played ♥10 to save my trumps, which gave away 1 point in Mighty time. Expecting the Friend's Mighty, the declarer loaded ♣J, and P3 dumped ♣4. P4 won with the Mighty for 4 points: 6:4. The Mighty hunt worked, but two of our point cards went with it.
Trick 7
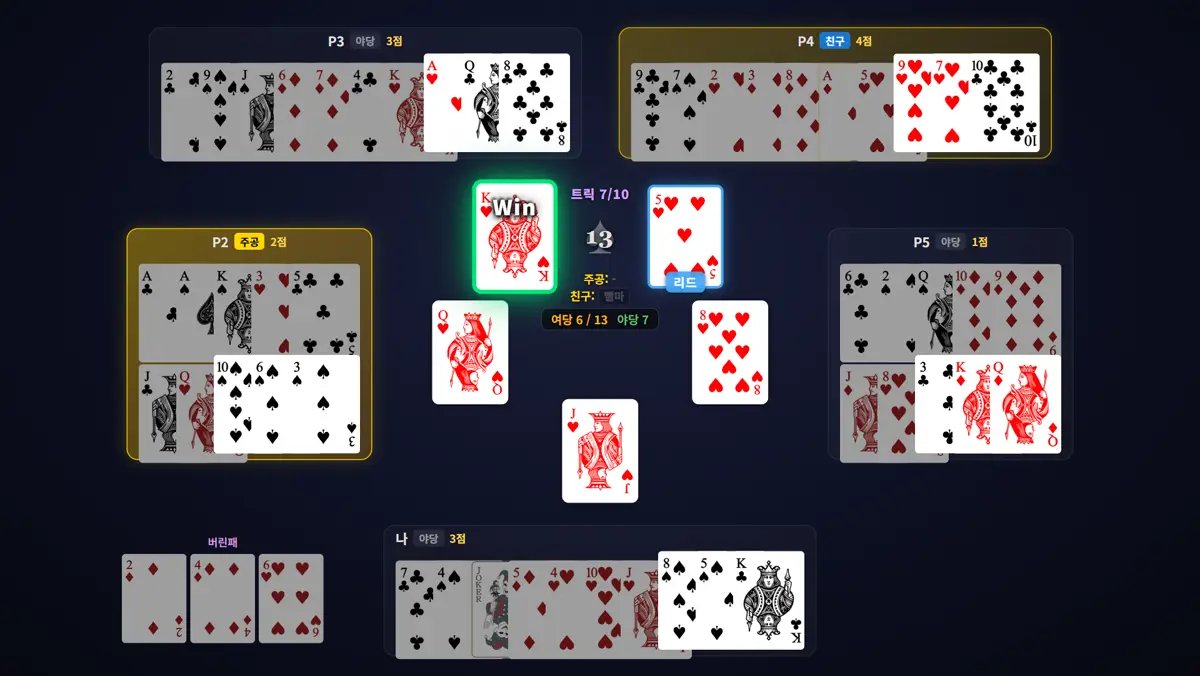
Having used the Mighty, P4 led ♥5 low. I followed with ♥J, my only heart; the declarer still had hearts, couldn't ruff, and played ♥Q. Last to play, P3 covered both with ♥K for 3 points, retaking the lead at 6:7. With the Mighty and Joker gone, the declarer's team had no strong card to take this trick. P3 likely won with ♥K instead of ♥A to keep ♥A as a boss card for the next lead.
Trick 8
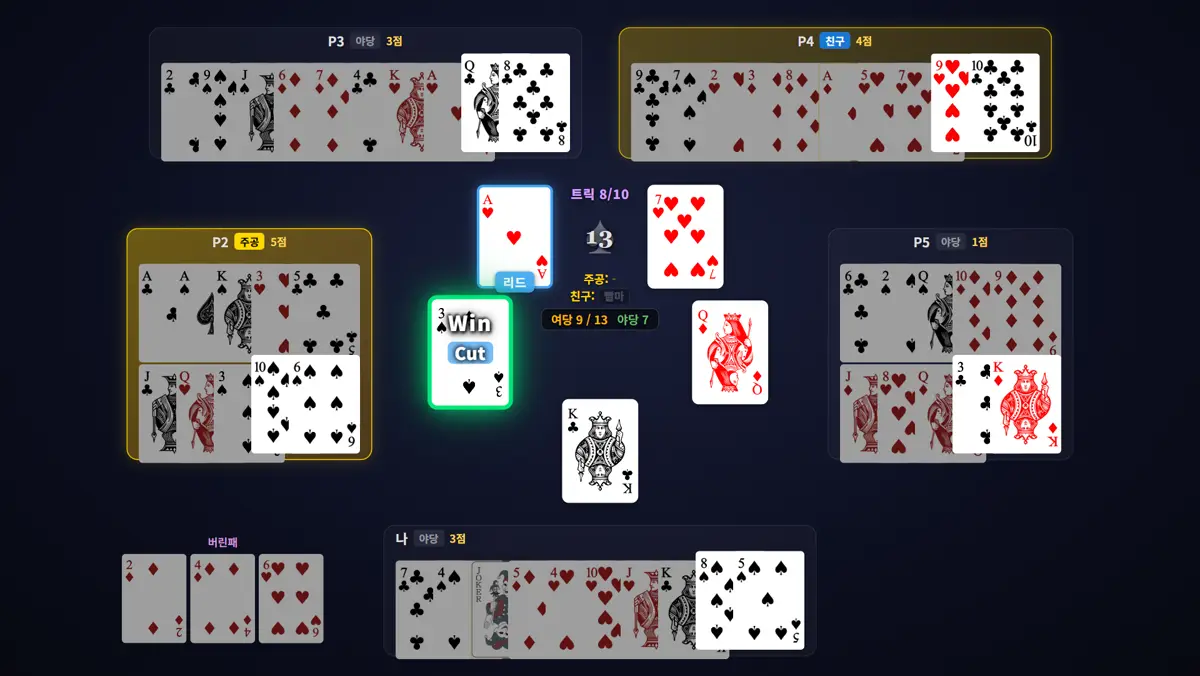
P3 led the boss ♥A; P5, out of hearts, loaded ♦Q, and I loaded ♣K. But the declarer was also out of hearts and ruffed with ♠3. Declarer's heart void revealed. If I had ruffed, the declarer, last to play, could have over-ruffed me. 3 points went to the declarer's team: 9:7. Counting trumps: 8 of 13 were out and I held 2, so 3 were elsewhere. In fact, all three were in the declarer's hand, so even a boss card couldn't escape the ruff.
Trick 9
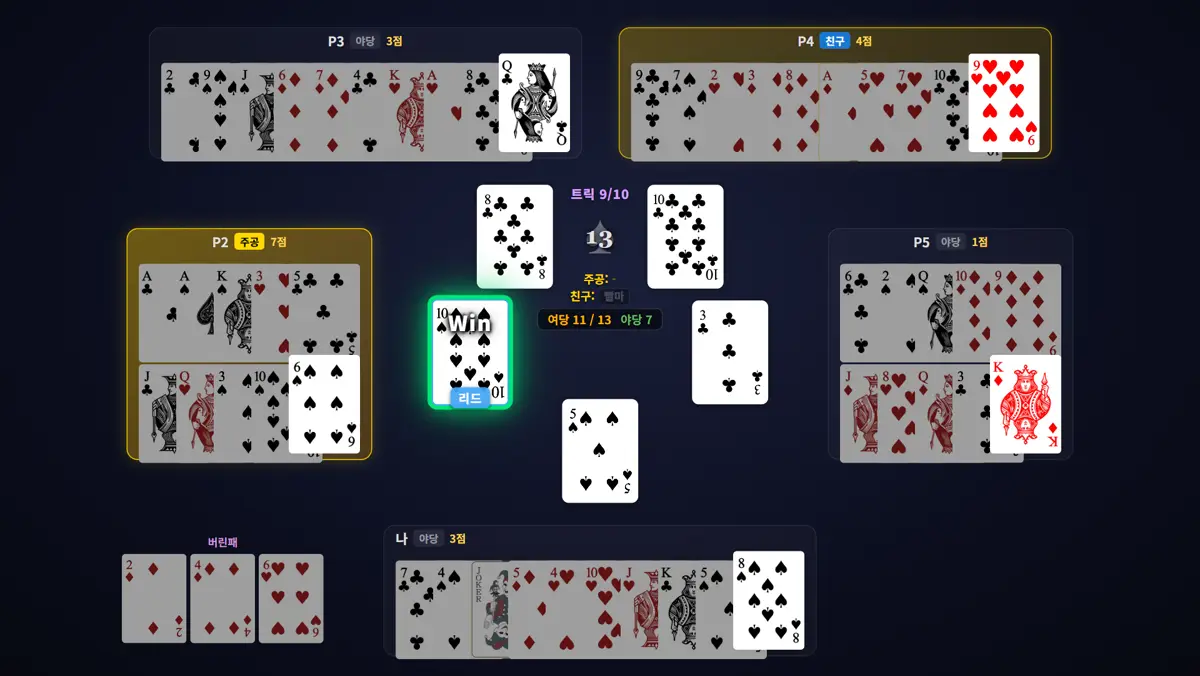
The declarer drew trumps with the highest one left, ♠10. I followed with ♠5, keeping ♠8; P3 and P5 had no trumps, revealing spade voids. Friend P4 loaded ♣10 for 2 points: 11:7. Two point cards remain, P3's ♣Q and P5's ♦K. If the declarer takes the last trick, that's exactly 13.
Trick 10
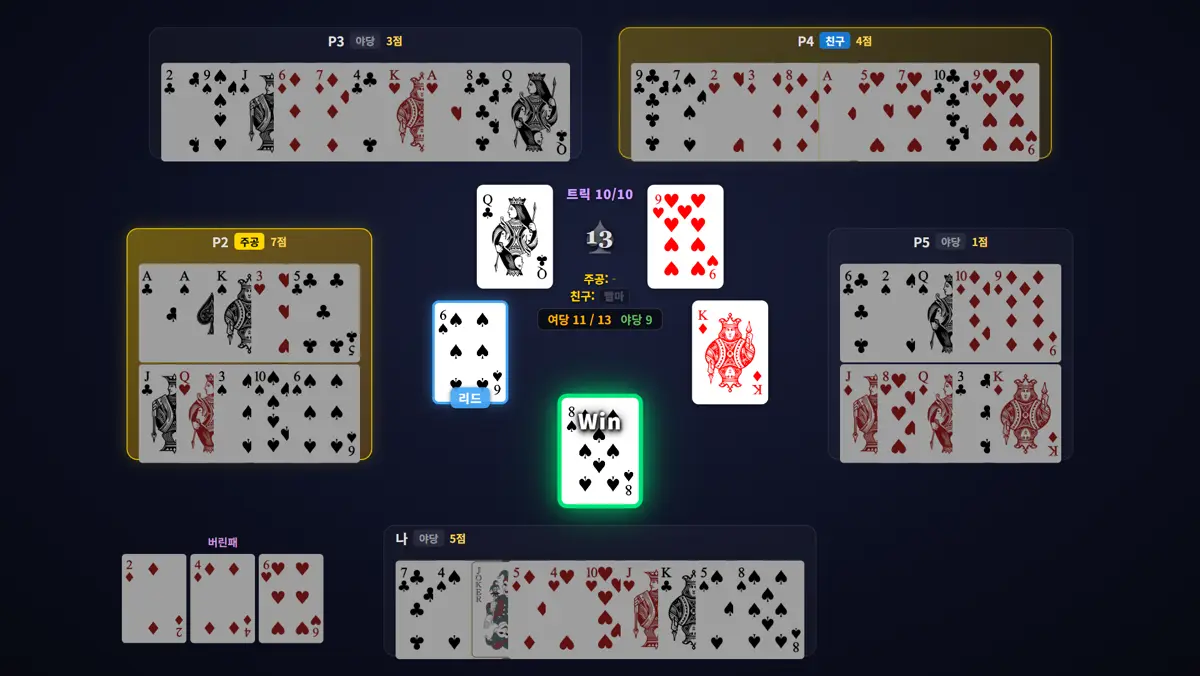
The declarer played the last card, ♠6, but the last trump, ♠8, was in my hand. Only ♠8 and ♠6 were left, and P3, P4, P5 had shown spade voids, so my partners could tell ♠8 was mine. P3 loaded ♣Q, P5 loaded ♦K, and my ♠8 won: 2 points. Final score 11:9. We set the contract.
Result
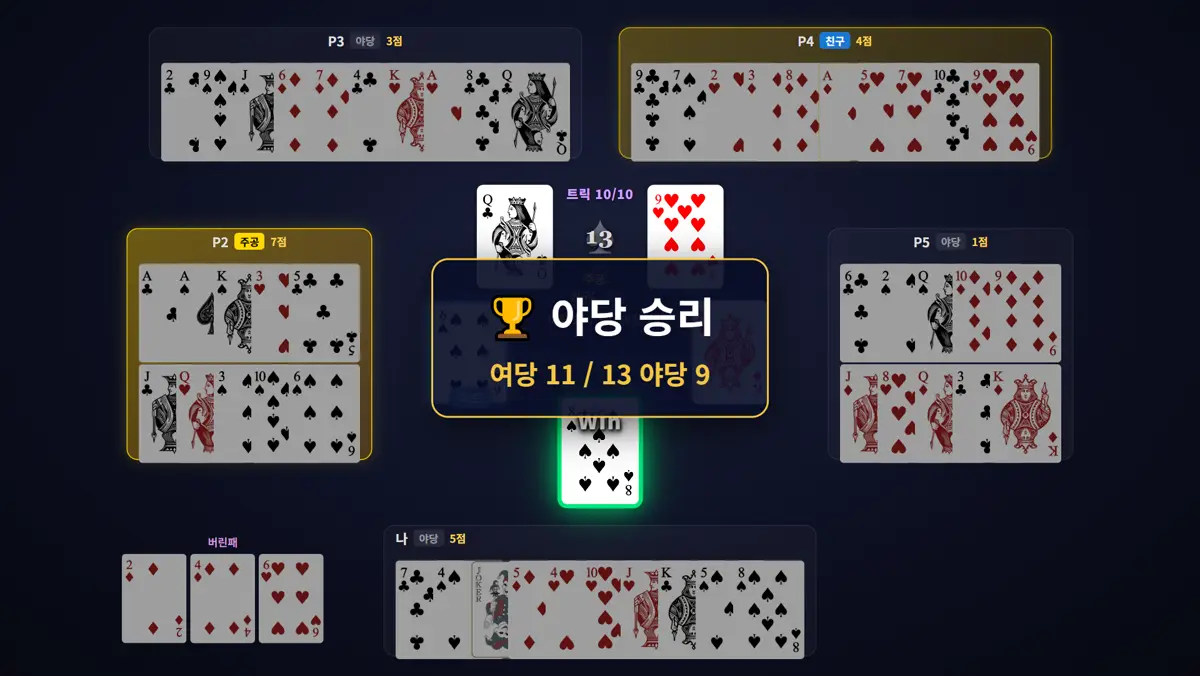
11:9, the defenders win. The declarer fell 2 points short of contract 13. Recap: 1) In trick 3, my last-seat Joker broke the trump drain for 3 trump points. 2) In tricks 4-6, P5 and I led diamonds to force out the Mighty early. The declarer's team saved the Mighty on 0- and 1-point tricks, but had to use it in trick 6. Still, losing two of our point cards in that Mighty time was a pity. 3) With the Mighty and Joker gone, high cards decided it, like P3's ♥K and my ♠8, saved to the end for the last 2 points. The basics: attack the Mighty with low cards, and don't load honors in Mighty time. You can step through this game in the Basics Replay section of Mighty Korea's school (mightykorea.com).